Did you know that you can add closed captioning or transcriptioning to a Zoom meeting?
Zoom provides free, AI-powered live transcription. Transcription is the process in which speech or audio is converted into a written, plain text document.
Live transcription only supports English and you must you speak clearly for best results. Unfortunately, live transcription is NOT supported in breakout rooms.
NOTE: The accuracy of Zoom’s live transcription feature depends on many variables, such as, but not limited to:
- Background noise
- Volume and clarity of the speaker’s voice
- Speaker’s proficiency with the English language
- Lexicons and dialects specific to a geography or community
OK, here’s how!
Before your Zoom meeting:
- Sign in to the Zoom web portal with your W&L credentials.
- In the navigation panel, click Settings.
- Click the Meeting tab.
- Scroll down to Closed captioning.
- Click the toggle to enable it. If a verification dialog displays, click Turn On to verify the change.

- With Closed Captioning enabled, the option to enable live transcription should appear directly below as Enable live transcription service to show transcript on the side panel in-meeting. Check this to enable live transcription.
- Click the toggle for Save Captions if you want to enable the ability for meeting participants to save closed captions or transcripts.
During your Zoom meeting:
- In a Zoom meeting you are hosting, click the Live Transcript button:

- Click on Enable Auto-Transcription:

You also have the option to assign a participant to type, manually type closed captions yourself, or copy the URL that you’d provide to a third-party closed captioning service.
As a Zoom Meeting Participant
- When enabled by the host, you will see a notification above Live Transcript in the meeting controls, informing you that the service is available.
- Click Live Transcript, and then select Show Subtitle. The provided subtitles can be clicked and dragged to move their position in the meeting window.
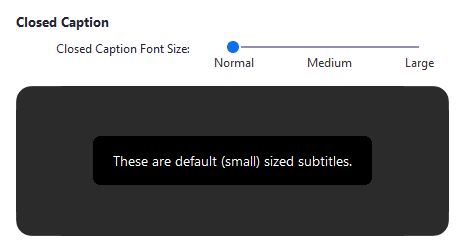
To adjust the caption size:
- Click the up ^ next to Start Video / Stop Video.
- Click Video Settings then Accessibility.
- Move the slider to adjust the caption size.

See Zoom’s guide to closed captioning and live transcription for more information!
Need help? Have questions? Contact the ITS Information Desk at 540.458.4357 (HELP) or email help@wlu.edu.
P.S. You can also enable live captions in a Teams meeting, too!